In This Article
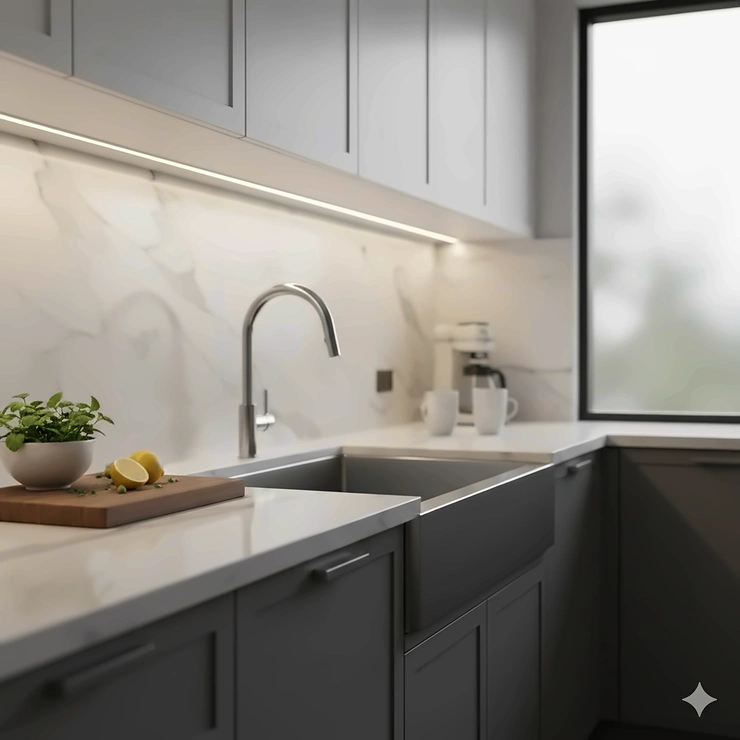
Remember when you had to squint to see what you were chopping because your overhead lights cast shadows on your workspace? I’ve been there, and it’s frustrating. That’s exactly why LED strip lights under cabinet have become a game-changer in modern kitchens across America.
These sleek lighting solutions do more than just illuminate dark countertops. They transform your entire cooking experience, making meal prep safer, easier, and honestly, way more enjoyable. Whether you’re dicing vegetables at midnight or showcasing your beautiful backsplash, the right under-cabinet lighting makes all the difference.
What makes LED strip lights under cabinet so special in 2026? The technology has evolved dramatically. We’re now seeing options with motion sensors that activate when you approach, smart connectivity that syncs with your phone, and adjustable color temperatures that shift from energizing daylight to cozy warm white. Plus, according to the U.S. Department of Energy, LEDs use at least 75% less energy and last up to 25 times longer than traditional incandescent lighting.
In this comprehensive guide, I’ll walk you through everything you need to know about choosing, installing, and getting the most from your LED strip lights under cabinet. We’ll cover real products currently available, compare features that actually matter, and help you avoid costly mistakes.
Quick Comparison Table
Here’s a snapshot of the top LED strip lights under cabinet to help you make a fast decision:
| Product | Length | Color Temp | Key Feature | Price Range | Rating |
|---|---|---|---|---|---|
| DAYBETTER 6 PCS | 9.8ft | 2700K-6500K | Adjustable white | $25-35 | 4.5/5 |
| WOBANE 6 PCS Kit | 9.8ft | 2700K | Super bright 1500lm | $30-40 | 4.6/5 |
| LAFULIT 8 PCS | 13ft | 2700K | Flexible connectors | $28-38 | 4.4/5 |
| Govee Motion Sensor | 9.8ft | 3000K | Auto on/off | $35-45 | 4.5/5 |
| SPEYCER Motion | 9.84ft | 6000K | 3 power modes | $32-42 | 4.3/5 |
| LAFULIT Motion 10 PCS | 16.4ft | 2700K | Remote + motion | $40-55 | 4.6/5 |
| Govee Smart RGB | 16.4ft | Multi-color | WiFi + voice control | $45-60 | 4.7/5 |
💬 Just one click – help others make better buying decisions too!😊
✨ Don’t Miss These Exclusive Deals!
Top 7 LED Strip Lights Under Cabinet: Expert Analysis
1. DAYBETTER Under Cabinet Lights 6 PCS – Best Overall Value
If you want flexibility without breaking the bank, the DAYBETTER Under Cabinet Lights deliver exactly what most homeowners need. This kit comes with six pre-cut strips totaling 9.8 feet, offering adjustable color temperature from warm 2700K to cool daylight 6500K.
Key Specifications:
- 6 pre-cut strips (9.8ft total)
- Adjustable 2700K-6500K color temperature
- RF remote + touch control
- Memory function
Price: $25-35
What sets this apart is the dual control system. You get both an RF remote with 60-foot range and a convenient touch dimmer. The memory function remembers your last brightness setting, so you’re not constantly readjusting. Installation takes about 15 minutes with the included 3M adhesive backing.
Customer Feedback: Users consistently praise the brightness and easy setup. One verified buyer mentioned, “Transformed my dark kitchen instantly,” though a few noted the adhesive could be stronger on textured surfaces.
✅ Pros:
- Adjustable color temperature
- Excellent remote range
- Budget-friendly
❌ Cons:
- Adhesive may need reinforcement
- Remote batteries not included
2. WOBANE Under Cabinet LED Lighting Kit – Brightest Output
Need serious illumination? The WOBANE Under Cabinet LED Lighting Kit pumps out an impressive 1500 lumens across six strips, making it the brightest option in this lineup. This linkable LED strip under cabinet solution works perfectly for larger kitchens or spaces requiring maximum visibility.
Key Specifications:
- 6 pre-cut strips (9.8ft total)
- 2700K warm white (CRI >82)
- 1500 total lumens
- Can connect up to 14 strips (22.96ft max)
Price: $30-40
The RF wireless remote includes timing functions, dimming controls, and hot buttons for your favorite settings. Safety is a priority here with DC 12V low-voltage operation and minimal heat generation. The high CRI rating above 82 means colors appear more natural and accurate under this lighting.
Customer Feedback: Professional contractors often recommend WOBANE for renovation projects. Customers report the lights staying securely attached even in humid kitchen environments.
✅ Pros:
- Exceptional brightness (1500lm)
- High color accuracy (CRI >82)
- Expandable system
❌ Cons:
- Single color temperature
- Higher price point
3. LAFULIT Under Cabinet Lighting Kit 8 PCS – Best Connector Design
The LAFULIT Under Cabinet Lighting Kit stands out with its innovative connector system. This plug in LED strip lights kitchen favorite includes eight 20-inch strips with flexible connectors that bend around corners effortlessly, solving one of the biggest installation challenges.
Key Specifications:
- 8 strips of 20 inches each (13ft total)
- 2700K warm white
- 6 brightness levels
- Dual control (remote + dimmer)
Price: $28-38
What makes this kit special is the combination of 4 long connectors (5.9 inches) and 4 short ones (2.8 inches), giving you freedom to navigate cabinet layouts. The timer function offers five options: 30 minutes, 1, 2, 3, or 4 hours, perfect for automatic shutoff.
Customer Feedback: DIY enthusiasts love the flexibility. Users appreciate how the connectors don’t create dark spots at corners, maintaining consistent illumination throughout.
✅ Pros:
- Flexible corner connectors
- Multiple timer options
- Easy DIY installation
❌ Cons:
- Limited to warm white only
- Connectors add slight bulk
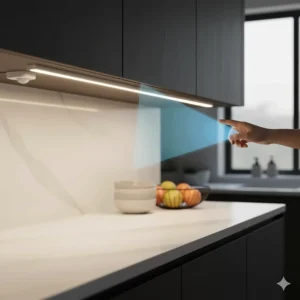
4. Govee Under Cabinet Lights Motion Sensor – Best Hands-Free Option
Want truly convenient lighting? The motion sensor LED strip cabinet option from Govee Under Cabinet Lights activates automatically when you approach, perfect for midnight snack runs or when your hands are full of groceries.
Key Specifications:
- 6 strips (9.8ft total)
- 3000K warm white (CRI >80)
- Motion sensor (6.56ft range)
- 6 brightness levels
Price: $35-45
The motion sensor has a 6.56-foot detection range and automatically shuts off after 15 seconds of no movement, saving energy. Switch to constant-light mode when you need continuous illumination for cooking. The memory function saves your preferred brightness level.
Customer Feedback: Parents love these for keeping kitchens safe at night. One customer noted they’re “perfect for elderly family members who forget to turn lights off.”
✅ Pros:
- Automatic activation
- Energy-saving auto-off
- Memory function included
❌ Cons:
- Cannot be cut or extended
- Motion sensor sensitivity not adjustable
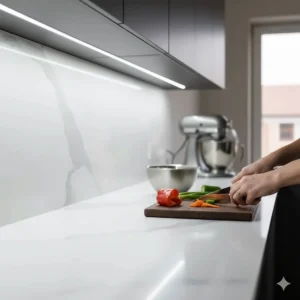
5. SPEYCER Motion Sensor Under Cabinet Lights – Most Versatile Settings
The SPEYCER Motion Sensor system offers three distinct power modes, making it the most adaptable dimmable LED strip under cabinet solution. Switch between manual on/off, always-on, and motion-sensing modes depending on your needs.
Key Specifications:
- 9.84ft LED strip
- 6000K cool white (1600 lumens)
- 3 power switch modes
- 6 brightness levels + timer
Price: $32-42
This system includes an advanced dimmer with six brightness levels and customizable timer settings from 10 to 600 seconds. The cool 6000K temperature provides energizing task lighting ideal for detailed food preparation. The strip is cuttable every 1.97 inches for perfect sizing.
Customer Feedback: Garage workshop owners particularly appreciate the bright, focused light. Kitchen users mention the cool white makes it easier to see true food colors.
✅ Pros:
- Three operational modes
- Extremely bright (1600lm)
- Customizable timer range
❌ Cons:
- Cool white may be too harsh for some
- Complex initial setup
6. LAFULIT 10 PCS Motion Sensor Kit – Best Premium Choice
For those who want it all, the LAFULIT 10 PCS Under Cabinet Lights Kit combines motion sensing with comprehensive remote control. This premium system gives you 16.4 feet of strip light length options with both automatic and manual operation modes.
Key Specifications:
- 10 strips of 20 inches (16.4ft total)
- 2700K warm white (Ra >80)
- 300 high-quality LEDs
- Motion sensor + remote control
Price: $40-55
The standout feature here is true dual-mode operation. Motion sensor mode works great for brief lighting needs in pantries or closets, while always-on mode provides constant illumination for cooking. With 10 brightness levels, you have precise control over ambiance. The linkable design with 9 connectors lets you create custom configurations.
Customer Feedback: Commercial kitchen operators appreciate the professional-grade construction. Homeowners note it’s “restaurant-quality lighting at a reasonable price.”
✅ Pros:
- Longest total length (16.4ft)
- 10 brightness levels
- Professional quality
❌ Cons:
- Higher investment required
- More complex installation
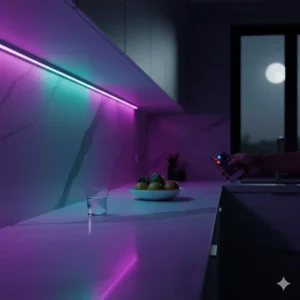
7. Govee Smart RGB LED Strip Lights – Best Smart Home Integration
The future of kitchen lighting is here with the Govee Smart RGB LED Strip Lights. This WiFi-enabled system works with Alexa and Google Assistant, offering voice control and smartphone connectivity. While it exceeds traditional under-cabinet applications, it’s perfect for those building smart kitchens.
Key Specifications:
- 16.4ft RGBIC strip
- Full color spectrum + warm/cool white
- WiFi + Bluetooth connectivity
- Voice control compatible
Price: $45-60
The RGBIC technology allows multiple colors to display simultaneously on one strip, creating dynamic lighting effects. The Govee Home app offers over 100 preset scenes and music sync capabilities. You can schedule automatic on/off times and control everything from your phone.
Customer Feedback: Tech enthusiasts rave about the integration possibilities. Smart home users mention it “perfectly syncs with their whole-house automation system.”
✅ Pros:
- Complete smart home integration
- Unlimited color options
- Voice control enabled
❌ Cons:
- Requires WiFi connection
- More features than needed for basic use
Understanding Strip Light Length Options
One of the most critical decisions when choosing LED strip lights under cabinet is determining the right length. Let me break down how to calculate what you actually need, because buying too short means gaps in lighting, while buying too long wastes money.
Measuring Your Space Correctly
First, grab a measuring tape and measure the full length of each cabinet section where you want lighting. Don’t just estimate – actual measurements matter here. Add up all sections, then add an extra 10% for flexibility. For example, if your cabinets total 15 feet, plan for about 16.5 feet of strips.
Most kits come with pre-cut sections ranging from 12 to 24 inches each. The beauty of systems like LAFULIT or WOBANE is their connector compatibility, letting you link sections together seamlessly. This modular approach gives you flexibility to navigate corners and irregular cabinet layouts.
Common Kitchen Configurations
Galley kitchens (two parallel counters) typically need 10-16 feet total. L-shaped kitchens usually require 15-20 feet to cover both walls adequately. U-shaped kitchens often need 20-30 feet for complete coverage. Island counters add another 6-12 feet depending on size.
Continuous vs. Sectional Coverage
You have two approaches here. Continuous coverage means lighting runs the entire length without gaps, creating uniform illumination – ideal for food preparation areas. Sectional placement targets specific zones like the coffee station or cooktop, using less material but creating distinct lit areas.
According to lighting research from the University of Florida, proper task lighting should provide 30-50 foot-candles for food preparation areas. Most quality LED strips deliver sufficient brightness when properly spaced.
Dealing with Corners and Obstacles
Corners present the biggest challenge. Flexible connectors from brands like LAFULIT bend around 90-degree turns smoothly, maintaining continuous lighting. Rigid strips require cutting and corner connectors, which can create slight dark spots. Plan connector locations before purchasing to ensure you have the right pieces.
For obstacles like range hoods or built-in appliances, measure around them rather than under them. Heat from ranges can damage LED strips, so maintain at least 12 inches clearance from cooking surfaces.
Evaluating Adhesive Backing Quality
Here’s something manufacturers don’t talk enough about: adhesive backing quality makes or breaks your installation experience. I’ve seen too many beautiful lighting systems fail simply because cheap adhesive couldn’t hold.
Understanding 3M Adhesive Standards
Premium LED strip lights under cabinet use genuine 3M VHB (Very High Bond) tape. This industrial-strength adhesive creates a permanent bond that withstands heat, humidity, and vibration. Lesser products use generic foam tape that loses grip within months, especially in steamy kitchen environments.
How do you identify quality adhesive? Check the backing paper – 3M products typically have red backing paper with clear 3M branding. The adhesive itself should feel slightly tacky but not overly sticky. If it feels like cheap packaging tape, it probably is.
Surface Preparation Is Everything
Even the best adhesive fails on dirty surfaces. Clean cabinet undersides thoroughly with rubbing alcohol, letting them dry completely. Remove any old adhesive residue, grease, or dust. This step takes 10 minutes but determines whether your lights stay up for years or fall down in weeks.
Painted wood, laminate, and metal surfaces all bond well with quality adhesive. Textured surfaces pose challenges – lightly sand them smooth before cleaning. For particularly difficult surfaces, consider supplementing adhesive with small mounting clips every 12 inches.
Temperature Considerations
Install lights when cabinets are at room temperature, ideally 65-85°F. Cold surfaces prevent proper adhesive bonding. After application, press firmly for 30 seconds and avoid disturbing the strips for 24 hours while the bond cures fully.
Some users add a thin bead of clear silicone adhesive along the strip edge for extra security, though this makes removal difficult later. If you might relocate lights eventually, stick with quality tape alone.
Long-Term Adhesion Maintenance
Heat cycling from cooking can eventually weaken adhesive bonds. Inspect strips every six months, re-pressing any loose sections. Keep cleaning products containing oils or solvents away from the adhesive area, as these can break down the bond over time.

Mastering Connector Compatibility
Connector compatibility determines how easily you can customize your layout and extend your system. Understanding connector types saves frustration during installation and enables future modifications.
Standard Connector Types
8mm 2-pin connectors fit most standard density strips (30-60 LEDs per meter). 10mm 2-pin connectors accommodate higher density strips (120+ LEDs per meter). The pin configuration must match your strip’s power input – never force mismatched connectors.
Straight connectors join strips end-to-end for extended runs. L-shaped connectors navigate 90-degree corners cleanly. T-connectors branch off to multiple directions, useful for island configurations. Some systems like LAFULIT include flexible ribbon connectors that bend in any direction.
Solderless vs. Soldered Connections
Most modern systems use clip-style solderless connectors requiring no tools. Simply slide the strip into the connector and snap closed. These work fine for permanent installations but can loosen with repeated adjustments.
Soldered connections create the most reliable bond and lowest electrical resistance, resulting in consistent brightness. However, they require basic soldering skills and make modifications difficult. Only consider soldering if you’re comfortable with the technique and won’t be changing the layout.
Voltage Drop Concerns
Electrical resistance increases with distance, causing brightness dimming at strip ends. This becomes noticeable beyond 16 feet on 12V systems. Combat voltage drop by:
- Using thicker gauge wire (16AWG minimum)
- Installing power injection every 16 feet
- Choosing 24V systems for runs exceeding 30 feet
Quality systems like WOBANE can connect up to 14 strips (nearly 23 feet) with their 24W adapter, minimizing voltage drop issues.
Waterproof Connector Considerations
Standard connectors aren’t waterproof, limiting use to dry locations. If installing near sinks or in damp areas, use IP65-rated waterproof connectors with silicone seals. These cost slightly more but prevent moisture damage to electrical connections.
Choosing Between Plug In LED Strip Lights Kitchen Options
The power connection method significantly impacts installation flexibility and appearance. Let’s explore the three main approaches and when each makes sense.
Plug-In Systems: Simplicity First
Plug-in configurations connect directly to standard 120V wall outlets, requiring zero electrical knowledge. You get instant functionality – just stick the strips up and plug them in. This approach works perfectly for renters who can’t modify wiring, or homeowners wanting DIY-friendly installation.
The downside? Visible power cords. You’ll need an outlet near the installation area or an extension cord (which looks messy). Most kitchens have outlets along backsplashes, making plug-in systems practical. Look for products with slim cords that blend with cabinet undersides.
Products like DAYBETTER and LAFULIT shine here, offering complete plug-in kits with remotes and dimmers. No electrician needed, no permit required, and completely reversible if you move.
Hardwired Systems: Professional Integration
Hardwired installations connect directly to your electrical system through a switch or junction box. This eliminates visible cords and integrates lighting with existing kitchen switches. The result looks cleaner and more professional.
Hardwiring requires basic electrical skills or hiring an electrician. You’ll need to route wiring through walls or cabinets, connect to junction boxes, and possibly install new switches. Most local codes require permits for new circuit work.
When hardwiring makes sense:
- New construction or major renovations
- Existing switched outlets near cabinets
- Permanent homes where investment pays off
- Desire for integrated lighting control
Battery-Powered Options: Maximum Portability
Battery-powered strips offer ultimate placement flexibility – install anywhere without outlets or wiring. Motion sensor models excel here, activating only when needed to conserve battery life.
Rechargeable systems like those from Govee use built-in batteries charged via USB, eliminating disposable battery costs. Expect 4-8 hours of continuous operation per charge, or weeks when using motion-only mode.
Battery power suits closets, pantries, and areas without convenient electrical access better than main cooking zones requiring constant illumination.
Motion Sensor LED Strip Cabinet Technology Explained
Motion sensor technology has revolutionized under-cabinet lighting, offering convenience and energy savings that manual systems can’t match. Understanding how these systems work helps you maximize their effectiveness.
PIR Sensor Technology
Passive Infrared (PIR) sensors detect heat signatures from human movement. When you walk within range, the sensor recognizes temperature change and triggers the lights. Quality sensors like those in Govee and SPEYCER products offer 6-10 foot detection ranges with 120-degree viewing angles.
Dual-Mode Sensing Options
Advanced systems provide both day and night modes. Day mode activates anytime motion occurs. Night mode only triggers in darkness, using ambient light sensors to detect conditions. This prevents unnecessary activation during daylight hours, extending battery life significantly.
LAFULIT’s 10-piece kit exemplifies sophisticated dual-mode operation, automatically switching between behaviors based on your needs.
Sensitivity and Timer Adjustments
Adjustable sensitivity prevents false triggers from pets or air movement. Look for systems letting you customize detection distance from 3-10 feet. Timer settings control how long lights stay on after detecting motion, typically ranging from 10 seconds to 10 minutes.
Short timers (15-30 seconds) work well in pantries where you grab items quickly. Longer timers (3-5 minutes) suit food preparation areas where you’re stationary but occasionally move.
Placement for Optimal Detection
Sensor placement affects performance dramatically. Install sensors at the front edge of cabinets facing the main traffic pattern. Avoid placing them where cabinet frames might block the detection cone. For long runs, multiple sensors prevent dark zones.
The SPEYCER system’s flexible sensor positioning allows strategic placement for maximum coverage efficiency.
Battery Life Considerations
Motion-activated systems consume minimal power compared to constant-on lights. Quality rechargeable systems like Megulla or Govee last 2-4 weeks on a charge with typical kitchen usage. Replace or recharge batteries proactively rather than waiting for lights to dim.
Some premium systems include low-battery indicators, alerting you before complete discharge.
Benefits Comparison: LED vs Traditional Cabinet Lighting
Switching to LED technology offers compelling advantages over traditional fluorescent, halogen, or xenon under-cabinet lighting. Let’s examine the real-world differences that impact your wallet and daily experience.
| Factor | LED Strip Lights | Fluorescent | Halogen | Xenon |
|---|---|---|---|---|
| Energy Efficiency | 6-8W per foot | 10-15W per foot | 25-40W per foot | 15-25W per foot |
| Lifespan | 50,000 hours | 10,000 hours | 2,000 hours | 10,000 hours |
| Heat Output | Minimal (<5°F) | Moderate | High (>30°F) | Moderate |
| Color Options | Wide spectrum | Limited | Warm only | Warm only |
| Installation | Simple adhesive | Fixed fixtures | Bulb replacement | Hardwired |
| Dimming | Smooth 0-100% | Limited/flickering | Good | Good |
| Initial Cost | $20-60 | $30-80 | $40-100 | $50-120 |
Energy Consumption Analysis
The Department of Energy reports that quality LED lighting products use at least 75% less energy than incandescent equivalents. For under-cabinet applications averaging 4-6 hours daily use, LED systems save approximately $80-120 annually on electricity compared to halogen alternatives.
Over a typical 15-year LED lifespan, that’s $1,200-1,800 in savings – far exceeding the initial purchase price difference.
Heat Generation Impact
Halogen bulbs release 90% of their energy as heat, which matters in kitchens. Excessive heat accelerates food spoilage, makes countertops uncomfortable to touch, and increases air conditioning loads. LEDs remain cool enough to touch even after hours of operation, improving kitchen comfort and safety.
Maintenance Freedom
Fluorescent tubes and halogen bulbs require periodic replacement, creating ongoing costs and hassle. LED strips last 5-10 years of normal use without maintenance. No more climbing ladders to change difficult-to-reach bulbs or dealing with delicate glass tubes.
Environmental Considerations
According to research from Indiana University of Pennsylvania, LEDs contain no toxic materials like the mercury found in fluorescent lamps. They’re 100% recyclable and reduce carbon footprints by approximately 33% through decreased energy consumption.
Installation Best Practices and Common Mistakes
Proper installation ensures your LED strip lights under cabinet function optimally for years. I’ve installed dozens of systems and learned from plenty of mistakes – let me help you avoid them.
Pre-Installation Planning
Before opening any packages, create a detailed installation map. Sketch your cabinet layout, marking:
- Exact strip placement locations
- Power source locations
- Connector positions for corners
- Switch or remote control placement
Measure twice, cut once applies perfectly here. Verify all measurements before committing adhesive to surfaces.
Surface Cleaning Protocol
This cannot be overstated – surface preparation determines 80% of installation success. Follow this process religiously:
- Wipe surfaces with warm, soapy water to remove grease
- Clean again with 70% isopropyl alcohol
- Allow 15 minutes for complete drying
- Verify dryness by touch before applying strips
Kitchen cabinets accumulate invisible cooking residue that prevents adhesion. The alcohol step removes oils that water alone can’t eliminate.
Positioning for Even Illumination
Install strips 2-3 inches from the front cabinet edge, not at the very front. This placement directs light downward onto countertops rather than forward into your eyes. Centered placement works for narrow cabinets under 12 inches deep.
For cabinets 18+ inches deep, consider dual rows – one at front, one at back – for comprehensive coverage without shadows.
Managing Wire Runs
Route power cords along cabinet backs where they’re invisible from below. Use small cable clips every 12-18 inches to keep wires neat and secure. Avoid running wires across open spaces where they’re visible.
For hardwired systems, route wiring through cabinet interiors when possible. Drilling small pass-through holes keeps installations looking professional.
Common Installation Mistakes to Avoid
Mistake 1: Installing directly on textured surfaces without prep. Solution: Lightly sand texture smooth first.
Mistake 2: Bending strips sharper than manufacturer specifications. Solution: Use proper corner connectors rather than forcing bends.
Mistake 3: Connecting too many strips to one power supply, causing voltage drop. Solution: Follow manufacturer’s maximum length specifications.
Mistake 4: Placing strips too close to heat sources like ranges. Solution: Maintain 12+ inch clearance from cooking surfaces.
Mistake 5: Not testing functionality before final adhesive bonding. Solution: Connect entire system and verify operation before permanent mounting.
Selecting Dimmable LED Strip Under Cabinet Systems
Dimming capability transforms static lighting into dynamic ambiance control. Not all dimmable LED strip under cabinet systems dim equally well – understanding the technology prevents disappointment.
True vs. PWM Dimming
Pulse Width Modulation (PWM) rapidly switches LEDs on and off to simulate dimming. Quality PWM dimmers operate above 1000Hz, appearing smooth to human eyes. Cheap PWM systems flicker noticeably, causing eye strain and headaches. All products recommended in this guide use high-frequency PWM that eliminates visible flicker.
Analog dimming actually reduces current flow, truly lowering LED output. This method produces the smoothest results but requires more expensive electronics. Premium systems like WOBANE use analog dimming for superior performance.
Dimming Range and Resolution
Look for systems offering 0-100% dimming ranges with at least 10 steps. Basic 3-level dimmers (low/medium/high) lack precision for creating perfect ambiance. The LAFULIT 10-piece kit’s 10 brightness levels provide excellent control granularity.
Some LED strips dim poorly below 20%, either shutting off completely or flickering unstably. Quality products maintain smooth operation even at 5-10% output, perfect for gentle nightlight functions.
Remote vs. Wall-Switch Dimming
Remote dimmers offer convenience – adjust lighting without moving. RF remotes work through cabinet doors with 30-60 foot ranges. IR remotes require line-of-sight but cost less.
Wall-switch dimmers provide familiar control but require installation. Ensure compatibility between your LED driver and wall dimmer. Not all combinations work smoothly; mismatches cause buzzing, flicker, or erratic behavior.
Smart Dimming Control
Systems like Govee integrate smartphone apps for ultimate control flexibility. Program gradual brightness changes matching sunrise/sunset, create schedules, or control multiple zones independently. Voice commands through Alexa or Google Assistant add hands-free convenience.
Smart dimming shines when coordinating kitchen lighting with whole-home automation systems.
Memory Functions
Memory-enabled dimmers (like DAYBETTER and LAFULIT systems) remember your last brightness setting, eliminating constant readjustment. This seemingly small feature dramatically improves daily usability – lights turn on at your preferred level automatically.
Some advanced systems store multiple presets, letting you switch between bright task lighting and dim ambient modes with one button press.
Price Range and Value Analysis
Understanding the relationship between price and performance helps you invest wisely. Here’s how different price tiers compare and what you’re actually paying for.
| Price Range | Typical Features | Best For | Example Products |
|---|---|---|---|
| $20-30 | Basic strips, simple remote, warm/cool white | Budget-conscious buyers, simple needs | DAYBETTER 6 PCS |
| $30-45 | Better brightness, memory function, quality adhesive | Most homeowners, standard installations | WOBANE, LAFULIT 8 PCS |
| $45-60 | Motion sensors, smart features, premium quality | Tech enthusiasts, convenience seekers | Govee Smart, LAFULIT 10 PCS |
| $60+ | Advanced smart features, premium construction | Luxury kitchens, whole-home integration | Govee RGBIC Pro |
Budget Options ($20-30)
Entry-level LED strip lights under cabinet deliver functional illumination at minimal cost. Expect basic remote controls, adequate brightness for food prep, and simple installation. Quality varies significantly in this range – stick with established brands like DAYBETTER to avoid disappointment.
Budget systems typically use lower-grade LEDs that may display slight color variation between strips. Adhesive backing often requires supplemental clips for long-term reliability. These limitations matter less for rentals or temporary installations.
Mid-Range Sweet Spot ($30-45)
This tier offers the best value for most buyers. You gain better LED quality with consistent color rendering, stronger adhesive, more robust construction, and useful features like memory functions and multiple brightness levels.
Mid-range products from WOBANE and LAFULIT provide professional results without premium pricing. The quality difference from budget options is immediately noticeable in brightness consistency and build quality.
Premium Investment ($45-60+)
High-end systems justify their cost through advanced features: motion sensing that actually works reliably, smart home integration, superior color accuracy (CRI >90), and construction quality ensuring decade-long operation.
Choose premium options when:
- Kitchen is your home’s focal point
- You’re building a smart home ecosystem
- Lighting must coordinate with other high-end fixtures
- Motion sensing is important for accessibility
FAQ: Your LED Strip Light Questions Answered
❓ How long do LED strip lights under cabinet typically last?
❓ Can I cut LED strip lights under cabinet to fit my exact cabinet length?
❓ Do motion sensor LED strip cabinet lights work with pets in the kitchen?
❓ What's the difference between linkable LED strip under cabinet and regular strips?
❓ How much energy do plug in LED strip lights kitchen actually save compared to traditional lighting?
Make the Right Choice for Your Kitchen
Choosing LED strip lights under cabinet doesn’t have to be complicated. Focus on what matters most for your specific situation:
For tight budgets: DAYBETTER offers reliable performance at entry-level pricing. You’ll get quality lighting without breaking the bank, though you might miss advanced features.
For maximum brightness: WOBANE’s 1500-lumen output illuminates even the largest kitchens brilliantly. Professional contractors prefer this system for commercial-grade performance.
For convenience: Govee’s motion sensor technology eliminates switches entirely. Perfect for busy families or anyone wanting truly hands-free lighting.
For smart homes: Govee Smart RGB integrates seamlessly with Alexa, Google Assistant, and automation systems. Control your kitchen lighting from anywhere.
For flexibility: LAFULIT’s connector systems navigate complex cabinet layouts effortlessly. Ideal for non-standard kitchen configurations.
Remember that proper installation matters as much as product selection. Clean surfaces thoroughly, position strips strategically for even illumination, and follow manufacturer guidelines precisely. Take your time during installation – rushing leads to problems.
According to the Energy Star program, LED technology continues advancing rapidly. Products available today offer dramatically better performance than options from just five years ago, with even greater improvements coming.
Your kitchen deserves lighting that enhances both functionality and ambiance. Whether you choose budget-friendly DAYBETTER or premium Govee Smart, you’re making an investment that pays dividends through reduced energy costs, improved visibility, and enhanced cooking experiences.
The right LED strip lights under cabinet transform dark countertops into well-lit workspaces, making meal preparation safer and more enjoyable. They showcase your beautiful backsplash, provide perfect task lighting for detailed work, and create inviting ambiance for entertaining.
Don’t settle for inadequate overhead lighting casting shadows exactly where you need to see clearly. Modern LED strip technology solves this problem affordably and efficiently. The products reviewed here represent the best options currently available in 2026, combining proven reliability with innovative features.
Your perfect kitchen lighting solution awaits in this lineup. Consider your budget, installation preferences, and desired features, then choose confidently knowing you’re getting quality products backed by thousands of satisfied customers.
✨ Transform Your Kitchen Lighting Today!
🔍 Take your kitchen illumination to the next level with these carefully selected LED strip lights. Click on any highlighted product to check current pricing and availability. These premium lighting solutions will help you create the functional, beautiful kitchen workspace you deserve!
Recommended for You
- 7 Best LED Puck Lights Under Cabinet 2026
- 7 Best LED Under Cabinet Lighting Options for 2026
- 7 Best Track Lighting for Kitchen 2026
Disclaimer: This article contains affiliate links. If you purchase products through these links, we may earn a small commission at no additional cost to you.
✨ Found this helpful? Share it with your friends! 💬🤗